Creating Asp.net Core web Api Entity framework Code First Appraoch | Testing Web Api Using Postman
Hello & As-salam u alikum ! In this Article we will learn to Implement Web Api and test the api through Postman.
Step# 1: Create an Asp.net Web API Project as shown in the below Images.


Step# 2: Create a model folder and add a new Entity Class named as "Product".
which I Had explained in my previous blog.
Step# 4: Add a static class for seeding database , i.e. "ModelBuilderExtensions" & add the below code.
Step# 5: Add a class for data access layer , i.e. "ProductContext" & add the below code.
Step# 6: Add a product interface to use repository pattern with constructor Dependency injection.
Step# 7: Implement IPorduct repository in Product Repository class.
Step# 8: Goto the Appsetting.json file and configure the connection string.

Step# 9: Go to the Startup.cs file and configure the middle-ware as shown below.

Step# 10: Add a new API controller named as ProductController.

Step# 11: Run the application & Open the Postman & test the Get API.
add "/Api/Product" after localhost:port in the Url.
Get All Product:

Get Product By Id:

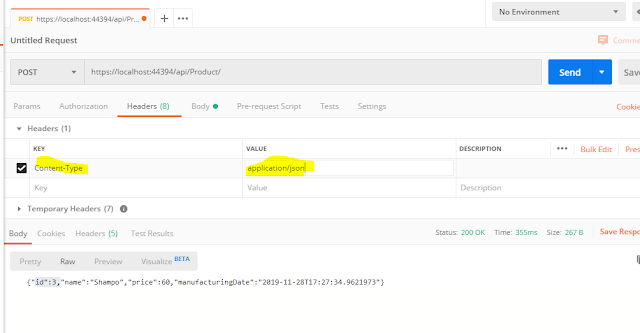
Add New Product:
Select Content-type : application/json

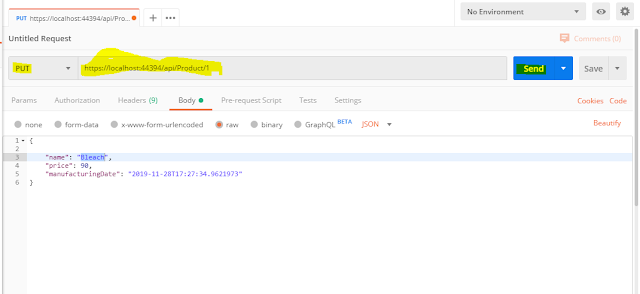
Update Product:
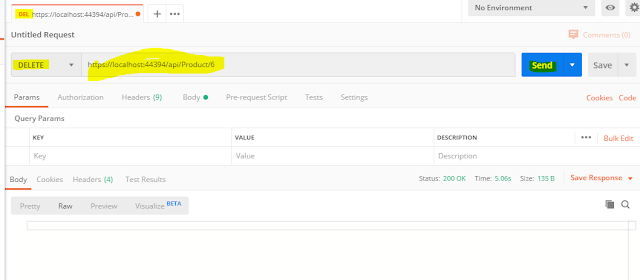
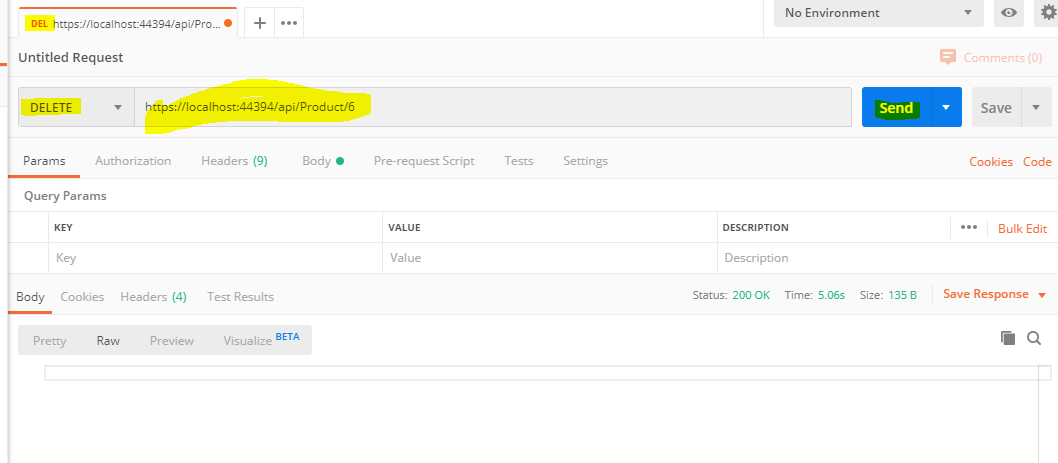
Delete the Product with ID 6:
Step# 1: Create an Asp.net Web API Project as shown in the below Images.


Step# 2: Create a model folder and add a new Entity Class named as "Product".
using System;
using System.Collections.Generic;
using System.Linq;
using System.Threading.Tasks;
namespace MircoServiceDocker.Model
{
public class Product
{
public int Id { get; set; }
public string Name { get; set; }
public int Price { get; set; }
public DateTime ManufacturingDate { get; set; }
}
}
Step# 3: Install Microsoft.EntityFrameworkCore.SqlServer & Microsoft.EntityFrameworkCore.Tools using System.Collections.Generic;
using System.Linq;
using System.Threading.Tasks;
namespace MircoServiceDocker.Model
{
public class Product
{
public int Id { get; set; }
public string Name { get; set; }
public int Price { get; set; }
public DateTime ManufacturingDate { get; set; }
}
}
which I Had explained in my previous blog.
Step# 4: Add a static class for seeding database , i.e. "ModelBuilderExtensions" & add the below code.
using Microsoft.EntityFrameworkCore;
using System;
using System.Collections.Generic;
using System.Linq;
using System.Threading.Tasks;
namespace MircoServiceDocker.Model
{
public static class ModelBuilderExtensions
{
public static void Seed(this ModelBuilder modelBuilder)
{
modelBuilder.Entity<Product>().HasData(
new Product
{
Id = 1,
Name = "Soap",
Price = 23,
ManufacturingDate = DateTime.Now
},
new Product
{
Id = 2,
Name = "Detergent",
Price = 200,
ManufacturingDate = DateTime.Now
},
new Product
{
Id = 3,
Name = "Shampo",
Price = 60,
ManufacturingDate = DateTime.Now
}
);
}
}
}
Step# 5: Add a class for data access layer , i.e. "ProductContext" & add the below code.
using Microsoft.EntityFrameworkCore;
using System;
using System.Collections.Generic;
using System.Linq;
using System.Threading.Tasks;
namespace MircoServiceDocker.Model
{
public class ProductContext:DbContext
{
public ProductContext(DbContextOptions<ProductContext> options) : base(options)
{
}
public DbSet<Product> Products { get; set; }
protected override void OnModelCreating(ModelBuilder modelBuilder)
{
base.OnModelCreating(modelBuilder);
modelBuilder.Seed();
}
}
}
Step# 6: Add a product interface to use repository pattern with constructor Dependency injection.
using System;
using System.Collections.Generic;
using System.Linq;
using System.Threading.Tasks;
namespace MircoServiceDocker.Model
{
public interface Iproduct
{
Product GetProduct(int Id);
IEnumerable<Product> GetAll();
Product Add(Product Product);
Product Update(int Id, Product Product);
Product Delete(int Id);
}
}
Step# 7: Implement IPorduct repository in Product Repository class.
using System;
using System.Collections.Generic;
using System.Linq;
using System.Threading.Tasks;
namespace MircoServiceDocker.Model
{
public class ProductRepository : Iproduct
{
private readonly ProductContext db;
public ProductRepository(ProductContext db)
{
this.db = db;
}
public Product Add(Product Product)
{
db.Products.Add(Product);
db.SaveChanges();
return Product;
}
public Product Delete(int Id)
{
Product product = db.Products.Where(x => x.Id == Id).SingleOrDefault();
db.Products.Remove(product);
db.SaveChanges();
return product;
}
public IEnumerable<Product> GetAll()
{
return db.Products.ToList();
}
public Product GetProduct(int Id)
{
return db.Products.SingleOrDefault(x => x.Id == Id);
}
public Product Update(int Id,Product Product)
{
Product product = db.Products.Where(x => x.Id == Id).SingleOrDefault();
product.Name = Product.Name;
product.Price = Product.Price;
product.ManufacturingDate = Product.ManufacturingDate;
db.SaveChanges();
return product;
}
}
}
Step# 8: Goto the Appsetting.json file and configure the connection string.

Step# 9: Go to the Startup.cs file and configure the middle-ware as shown below.

Step# 10: Add a new API controller named as ProductController.

using System;
using System.Collections.Generic;
using System.Linq;
using System.Threading.Tasks;
using Microsoft.AspNetCore.Hosting;
using Microsoft.AspNetCore.Http;
using Microsoft.AspNetCore.Mvc;
using MircoServiceDocker.Model;
namespace MircoServiceDocker.Controllers
{
[Route("api/[controller]")]
[ApiController]
public class ProductController : ControllerBase
{
// GET: api/Product
private Iproduct db;
public ProductController(Iproduct db)
{
this.db = db;
}
[HttpGet]
public IEnumerable<Product> Get()
{
return db.GetAll();
}
// GET: api/Product/5
[HttpGet("{id}", Name = "Get")]
public Product Get(int id)
{
return db.GetProduct(id);
}
// POST: api/Product
[HttpPost]
public void Post(Product product)
{
db.Add(product);
}
// PUT: api/Product/5
[HttpPut("{id}")]
public void Put(int id, Product product)
{
db.Update(id, product);
}
// DELETE: api/ApiWithActions/5
[HttpDelete("{id}")]
public void Delete(int id)
{
db.Delete(id);
}
}
}
Step# 11: Run the application & Open the Postman & test the Get API.
add "/Api/Product" after localhost:port in the Url.
Get All Product:

Get Product By Id:

Add New Product:
Select Content-type : application/json


Update Product:

Delete the Product with ID 6:
posted by .NET Developer Community (.net core & .net framework) @ November 29, 2019
0 Comments
![]()


